Send submissions to Power Automate
Twenty minutes, once per form. A LocalForm webhook is an ordinary JSON POST, and Power Automate's When an HTTP request is received trigger is an ordinary JSON endpoint - so the two connect without a connector, a plugin or an account anywhere in between. At the end of this you have a cloud flow that fires on every registration and can write it into SharePoint or Dataverse, start an approval, or post it to Teams.
Start with Send submissions to another system if you have not: the payload, the field names, the delivery log and the retry behaviour are the same wherever you send them, and this page does not repeat them.
The Request trigger is a premium connector. You need a Power Automate Premium (or per-flow) licence on the account that owns the flow; a seeded Microsoft 365 licence alone will not run it.
Build the flow first. Power Automate only hands you the URL once the flow is saved, and the URL is the thing LocalForm needs.
1. Create the flow and its trigger
- Go to make.powerautomate.com, pick the environment you want the flow to live in, and choose Create → Instant cloud flow.
- Name it after the form ("Autumn Workshop registrations"), select When an HTTP request is received, and choose Create.
- Open the trigger card. Leave HTTP URL alone - it is read-only and fills itself in when you save.
2. Give it the payload shape
The trigger will accept anything, but without a schema you get no dynamic content to map from. Select Use sample payload to generate schema and paste a payload that matches your form:
{
	"form_id": 12,
	"form_title": "Autumn Workshop 2026",
	"submission_id": 345,
	"timestamp": "2026-09-01T10:00:00+00:00",
	"event_date": "2026-09-12",
	"event_time": "19:00",
	"event_location": "De Markten, Brussels",
	"event_organizer": "Workshop Team",
	"payment_price": 25.0,
	"fields": {
		"name": "Ada Lovelace",
		"email": "ada@example.com",
		"session_track": "Morning"
	},
	"custom_fields": {
		"source": "website"
	}
}
Two things decide whether the rest of the flow is pleasant to build:
- Use the real field names. The keys inside
fieldsare the field names from the builder, not the question labels -session_track, not "Which session are you attending?". Read them from the ⋯ menu on each question card. - Fill every value in the sample. A key you leave out of the sample is a key you cannot pick from dynamic content later.
Optional fields that a given submission may not carry (event_date on a form with no event, submission_id in webhook-only mode) arrive as null. The generated schema types them as "string", which the trigger tolerates - it does not validate by default - but a downstream action can still choke on the null. Where that matters, widen the type by hand:
"event_date": { "type": ["string", "null"] }
3. Let LocalForm call it
Still on the trigger card, set Who can trigger the flow to Anyone.
This one is not optional and it is the single most common reason a first attempt fails. The other two settings ("Any user in my tenant", "Specific users in my tenant") require the caller to present a Microsoft Entra ID bearer token, and WordPress has none to offer - the POST comes back 401 and the submission never reaches the flow. With Anyone, the URL itself is the credential, which is why step 6 exists.
Now Save. The HTTP URL field fills in; copy it with the copy button rather than by selecting the text, because it is long enough to truncate by hand and a truncated URL fails as a 404.
4. Paste the URL into the form
Open the form in WordPress, go to the General panel, and paste it into Webhook URL.
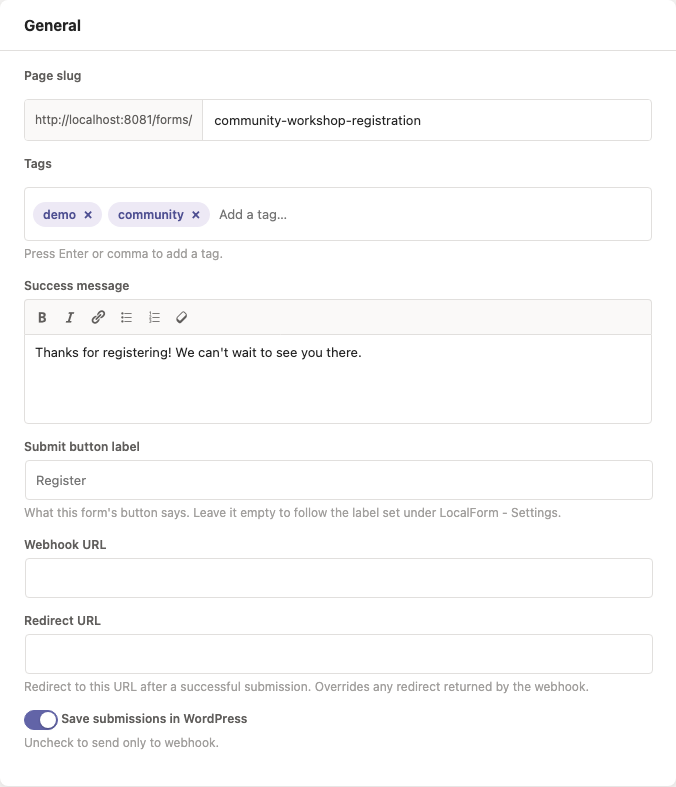
If several forms should reach the same flow, set it once under LocalForm → Settings → Webhooks instead - every form without its own URL uses that.
5. Submit once, then read both logs
Fill in the published form yourself, as a visitor would, then check the two ends:
- LocalForm → Settings → Webhooks → Logs shows the payload sent, the response code and the response body, kept for 30 days. A successful Power Automate call answers
202 Acceptedwith an empty body - anything in the 2xx range counts as delivered. - Power Automate → My flows → your flow → Run history shows the run and, inside the trigger's outputs, the exact JSON that arrived.
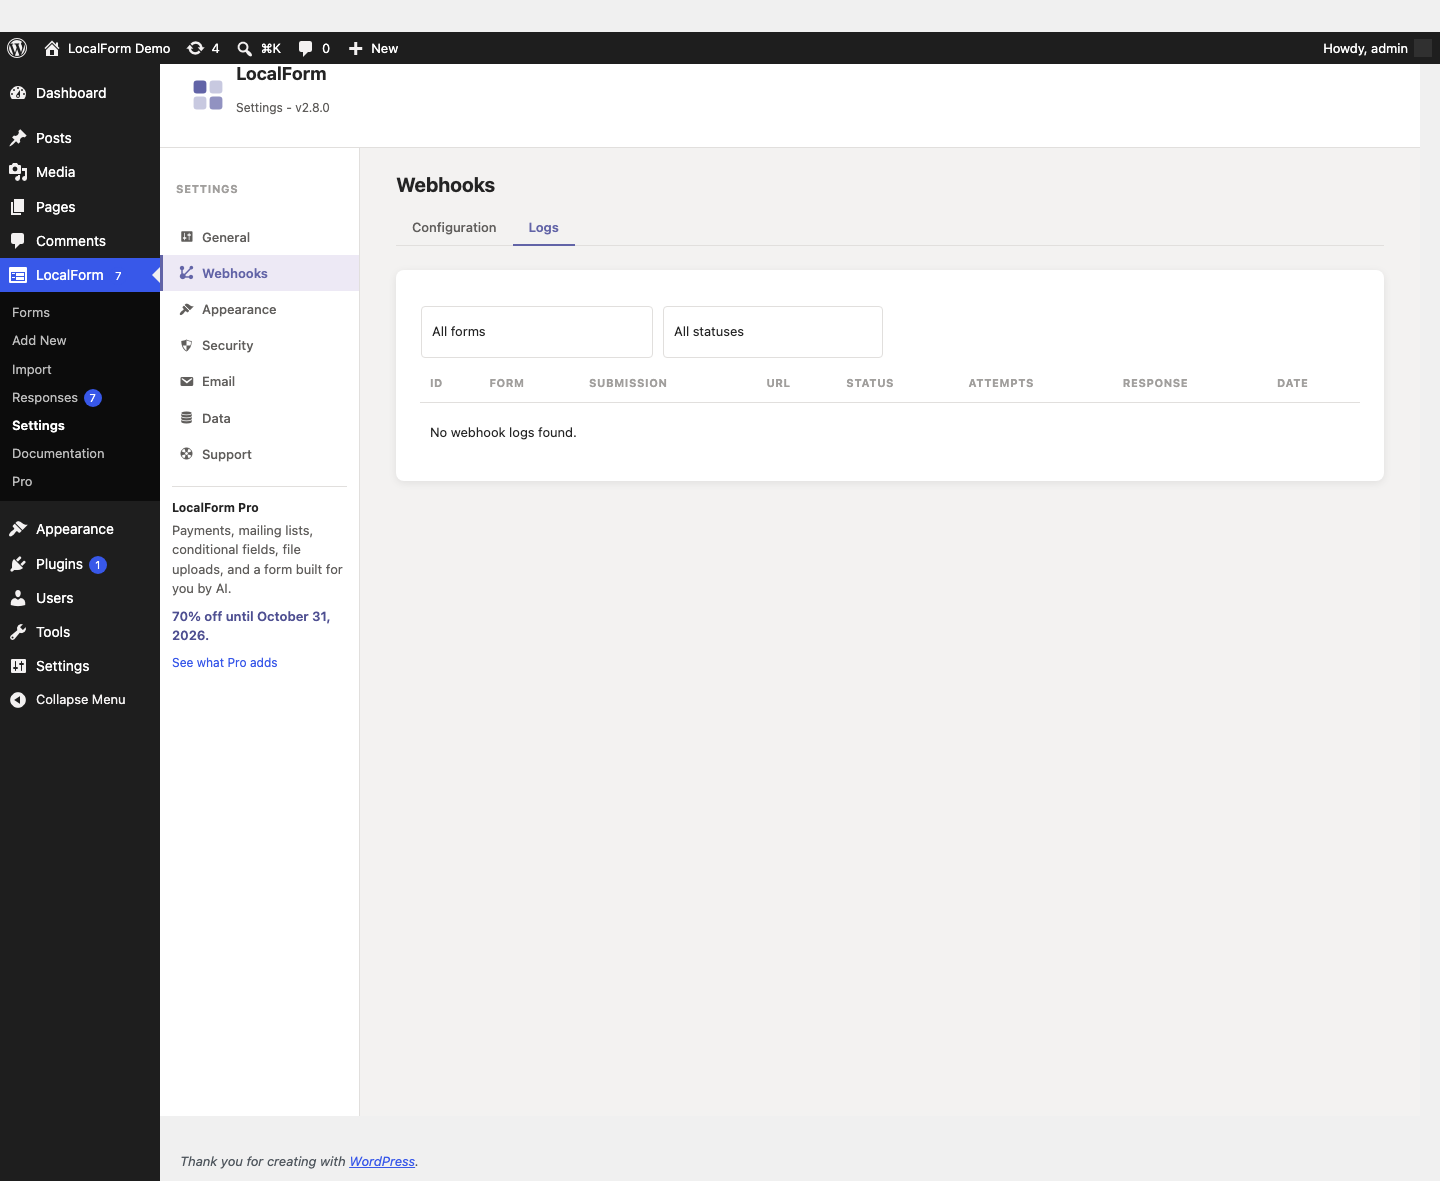
Debug from the LocalForm log first: it is the only place that distinguishes "never sent" from "sent and rejected".
| What the log shows | What it means |
|---|---|
| Nothing at all | WP-Cron has not run yet on a quiet site. Load any page and look again. |
401 | The trigger is still set to a tenant-restricted mode. Back to step 3. |
404 | The URL was truncated or the flow was deleted. Re-copy it. |
502 / 504 | The flow ran longer than LocalForm's 15-second timeout. See step 7. |
Now add whatever the flow is actually for - Create item (SharePoint), Add a new row (Dataverse), Start and wait for an approval, Post message in a chat or channel - and pick the answers out of dynamic content, where they appear under the names you gave them in step 2.
6. Verify that a request really came from your site
With Anyone selected, anyone who learns the URL can post to it, and the flow cannot tell them from you. Power Automate has no hashing function in its expression language, so the X-LocalForm-Signature header LocalForm sends (HMAC-SHA256 of the body, see webhooks) cannot be verified inside a flow - it is there for endpoints that can.
Use the shared secret in the payload instead. On this side that means two things: add the key to your sample payload in step 2 so it reaches dynamic content, then make the first action after the trigger a Condition comparing custom_fields.shared_secret to the expected string, with a Terminate action in the "If no" branch.
7. Keep the flow fast, or hand the visitor onward
The Request trigger answers 202 the moment it accepts the request, so most flows never come close to LocalForm's 15-second limit - but a Response action makes the flow hold the request open until it runs, and a slow step before it turns into a duplicate run. Keep the work before the response short, or move the slow part into a child flow you start without waiting for.
Where a duplicate would cost something, deduplicate on submission_id: a filter query on the SharePoint list, or a Dataverse alternate key, turns the second delivery into a no-op.
If you want the flow to decide where the visitor lands after submitting - a payment page, a personalised thank-you - add a Response action returning { "redirect_url": "https://…" }, or setting an X-LocalForm-Redirect header, and put it early enough to answer inside those 15 seconds. A Redirect URL set on the form itself always wins over one the flow returns, which is the first thing to check when a redirect goes somewhere unexpected.
The full payload reference - including the Pro event_dates and payment_prices arrays - is in webhooks. The other walkthroughs: Zapier, n8n.
LocalForm is not affiliated with, or endorsed by, Microsoft.